Quick Start : Amazon Web Services (AWS)
This guide is set up to help you offload your media to an Amazon S3 bucket using Media Cloud Sync quickly and efficiently.
Logging In to the AWS Console
To create an IAM user, first log in to your existing AWS account here.
If you don’t have an AWS account, you can register for a new one here.
Creating an IAM User
After logging into your AWS account, you’ll need to set up a new IAM user.
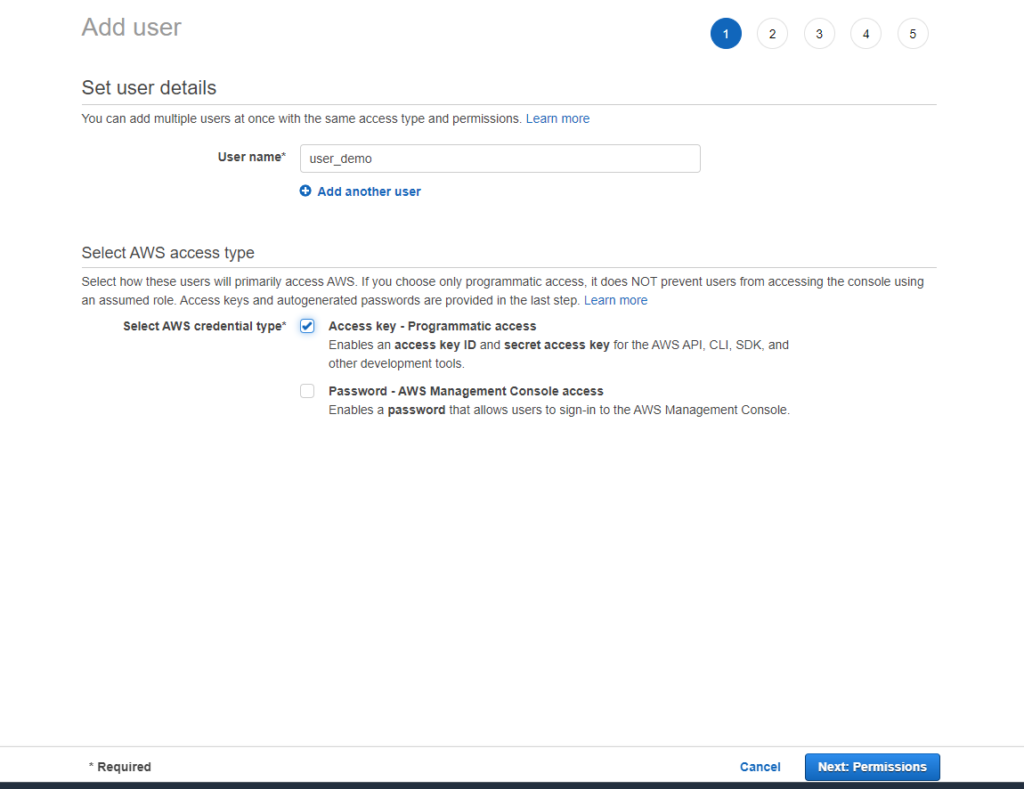
To do this, navigate to the IAM Users page in the AWS console and click the Add user button.
You can set your preferred username in the User name field.
Usernames are case-insensitive and must be unique within your AWS account. They can contain up to 64 characters, including letters, digits, and the following special characters: plus (+), equal (=), comma (,), period (.), at-sign (@), and hyphen (-).
Select the checkbox for Programmatic access under Access type, and then proceed by clicking the Next: Permissions button.
Specific Permission
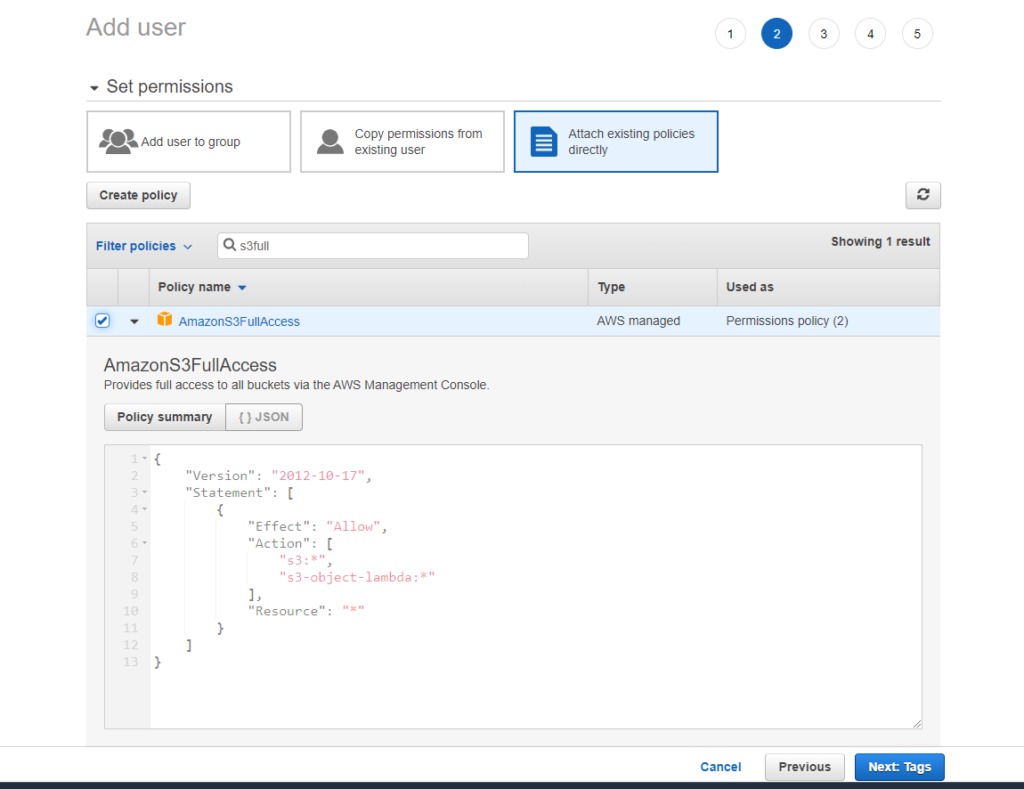
To ensure a smooth setup of Offload Media – Cloud Storage, it’s recommended to grant full access to Amazon S3 for new users. The AmazonS3FullAccess policy is designed to help avoid common issues during the initial configuration.
While experienced AWS users may choose to create a custom IAM policy, new users are encouraged to start with full access. IAM policies can always be edited later to restrict access to only the necessary resources.
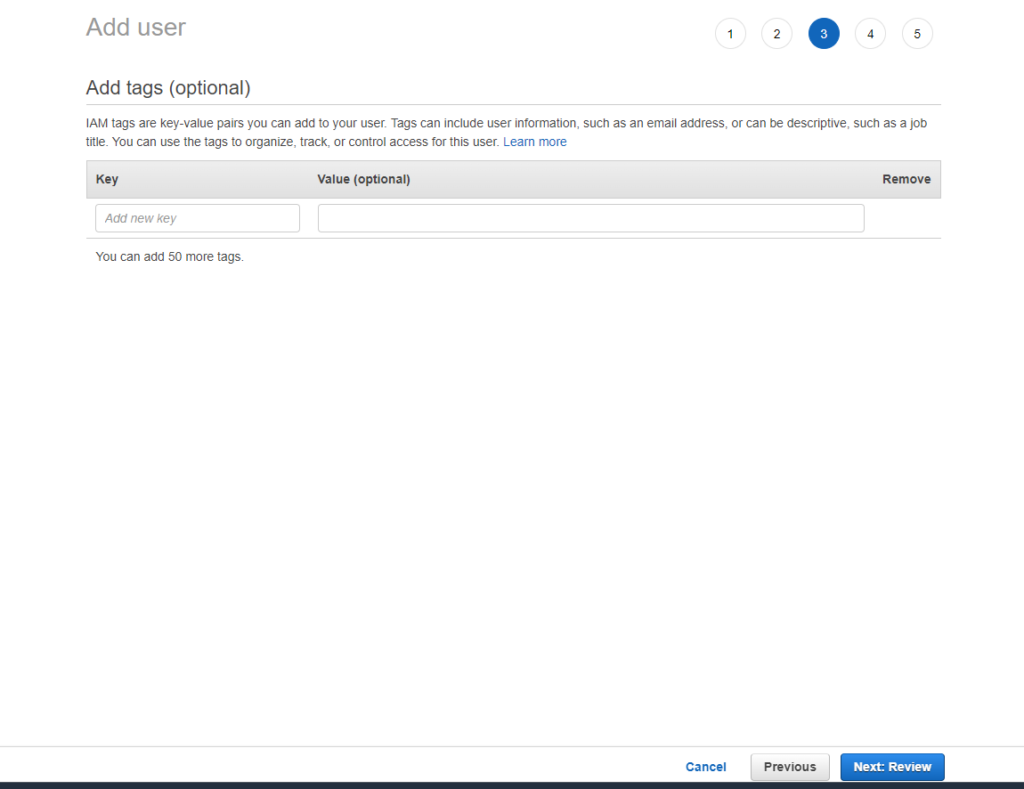
The third page allows you to add tags, which are completely optional. Tags are primarily used by experienced AWS users to assist with resource management and organization.
If you choose to add tags, enter the desired key-value pairs. Once you’re done—or if you decide to skip this step—click the Next: Review button at the bottom of the page to proceed.
If you’re satisfied with all the selections and configurations, click the Create user button to complete the setup.
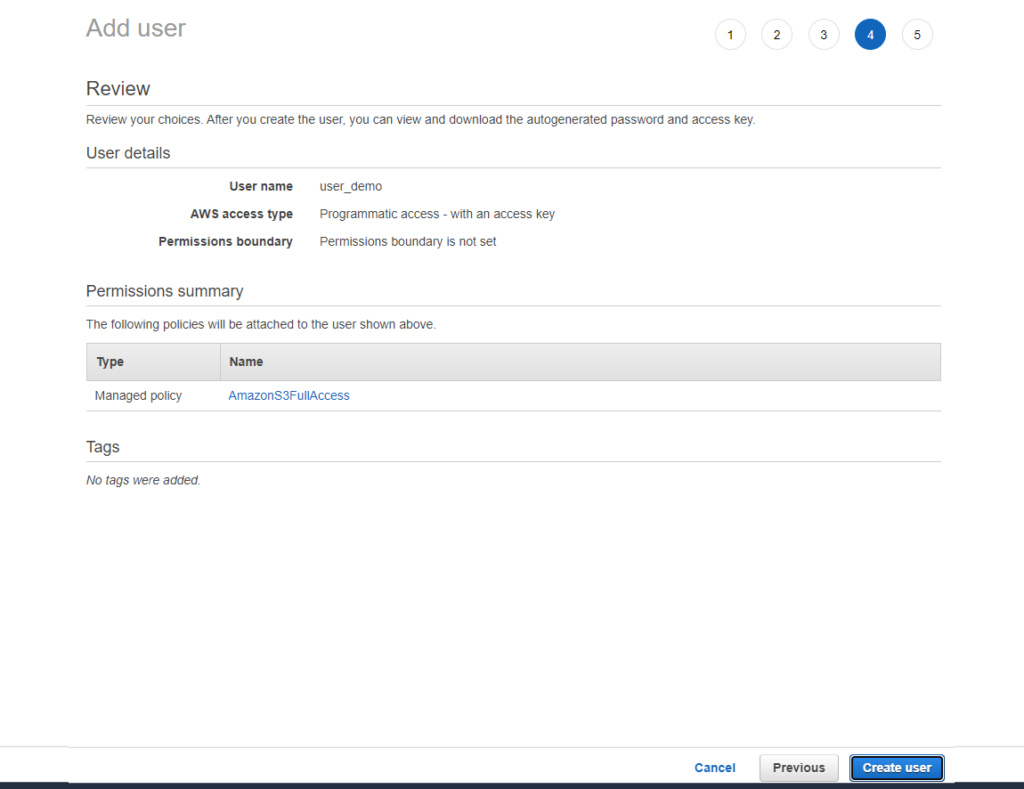
After creating the user, the next page will display the security credentials, which include the Access Key ID and Secret Access Key. These credentials are shown only once, so it is strongly recommended to download them as a .csv file and store them securely.
⚠️ Important: You will not be able to view the Secret Access Key again. If it is lost, you will need to generate a new set of credentials from the AWS Management Console.
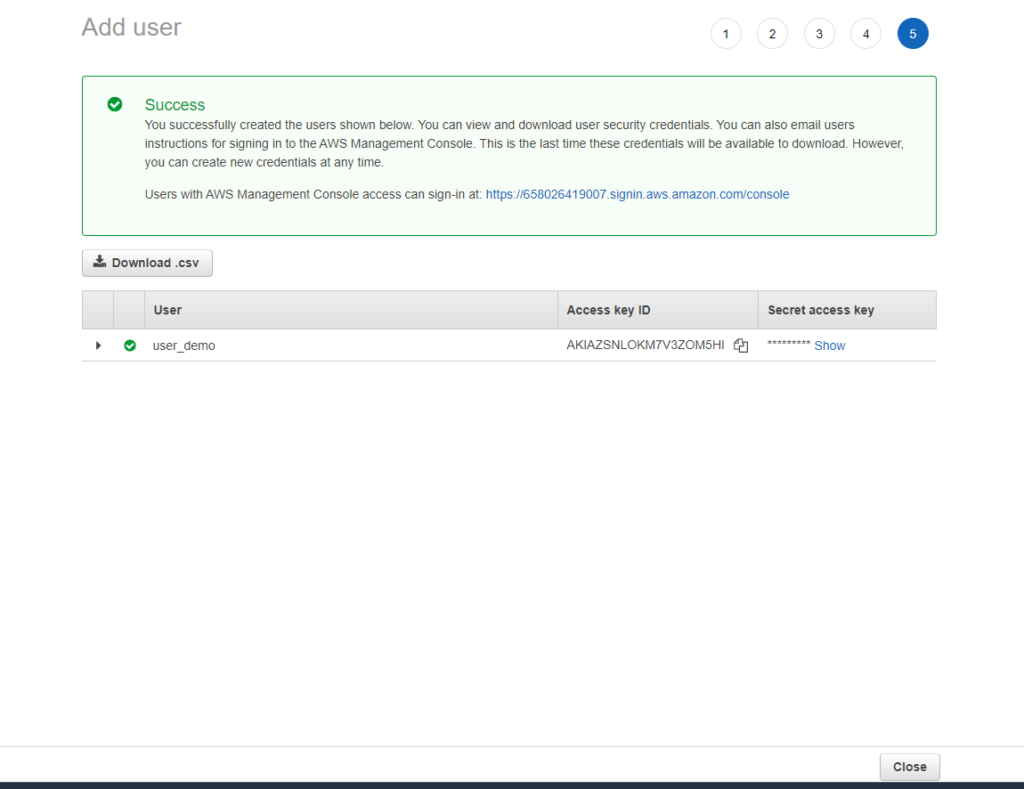
Clicking the Close button will take you back to the IAM Users page, where you can view and manage all your IAM users.
Create an Amazon S3 Bucket
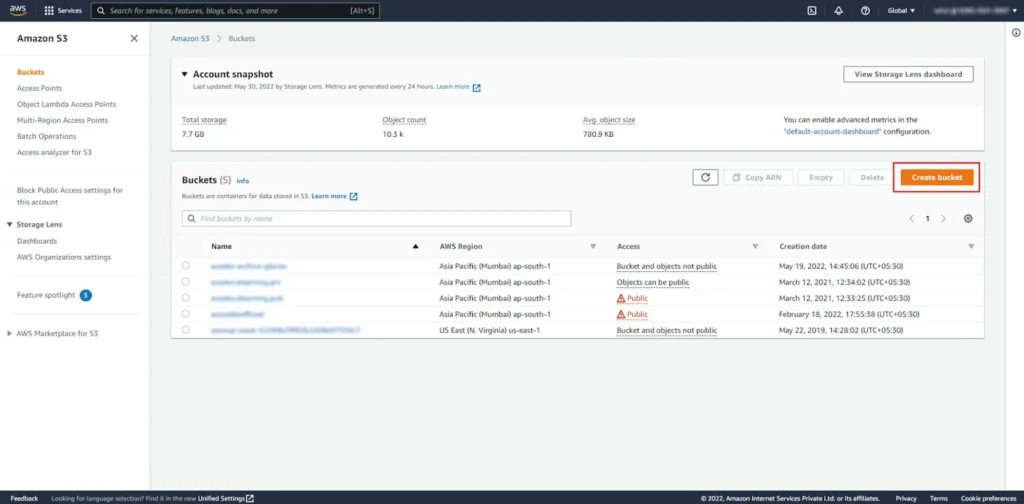
1. Navigate to Amazon S3
- Go to the Amazon S3 section in the AWS Management Console.
- Click the Create bucket button.
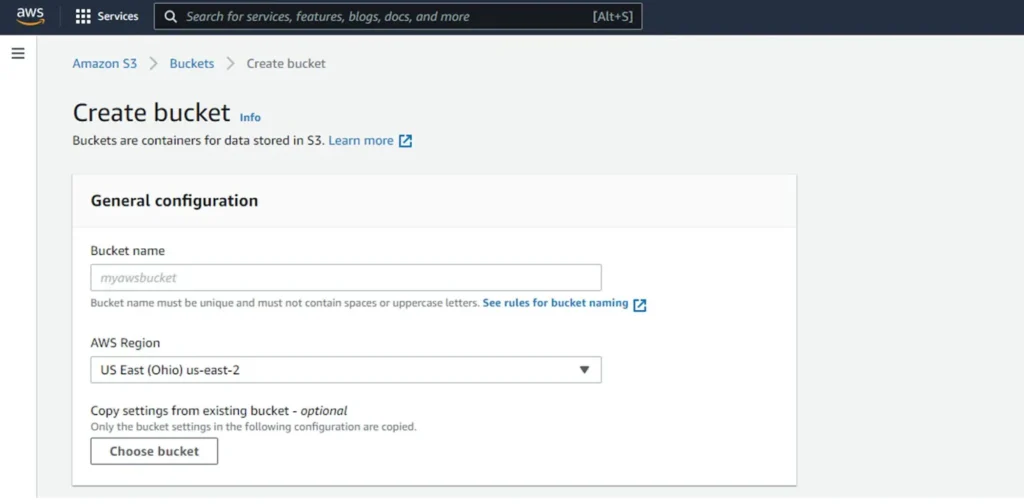
2. General Configuration
- Bucket Name: Enter a unique name for your bucket.
- AWS Region: Select the region where you want the bucket to be hosted.
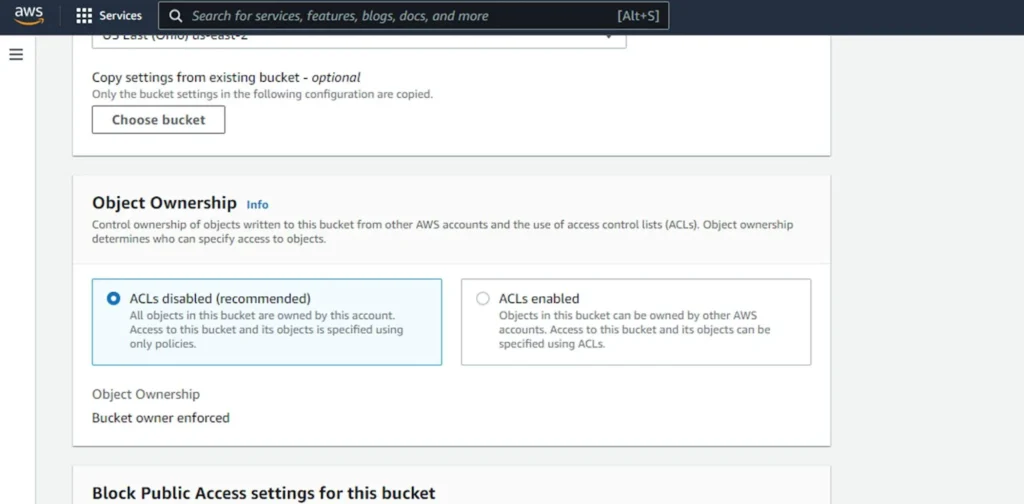
3. Configure Object Ownership
- Choose one of the following:
- ACLs disabled (recommended): All objects are owned by your account. Access is managed using policies only.
- ACLs enabled: Objects can be owned by other AWS accounts. Access can be managed using ACLs.
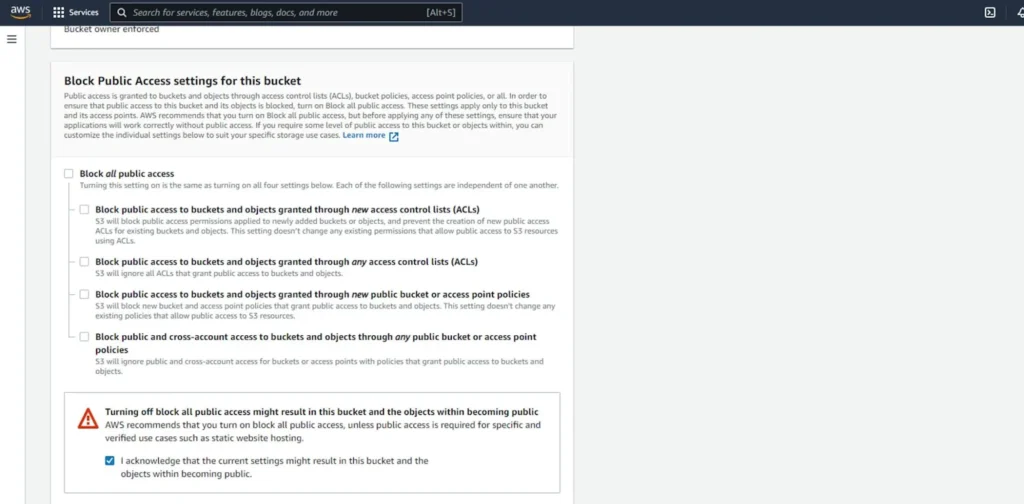
4. Set Public Access Settings
- If you are using a CDN you can skip this step. Without a CDN the public access is needed
- Uncheck all checkboxes to disable the default block public access settings.
- This will enable public access to the bucket, which is necessary for media offloading.
5. Leave Other Settings as Default
- You can keep the rest of the settings as they are.
- Click the Create bucket button.
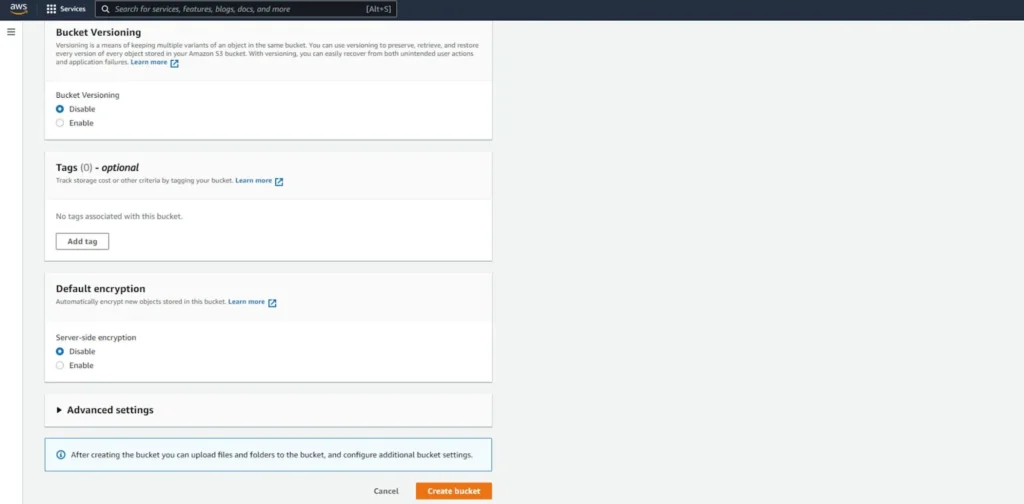
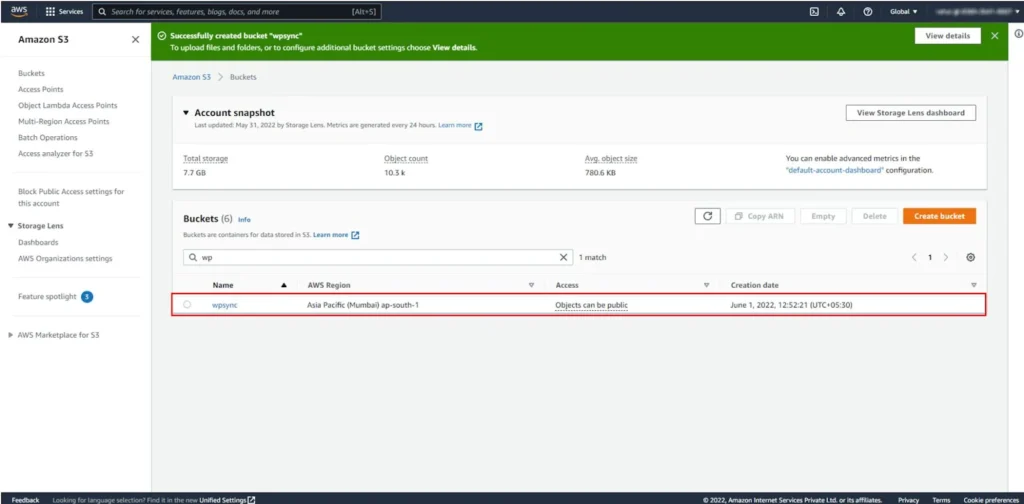
Your bucket will now be created in the selected region.
6. (Optional) Add a Bucket Policy
If you encounter permission issues, you can add a bucket policy in JSON format to grant access to a specific IAM user.
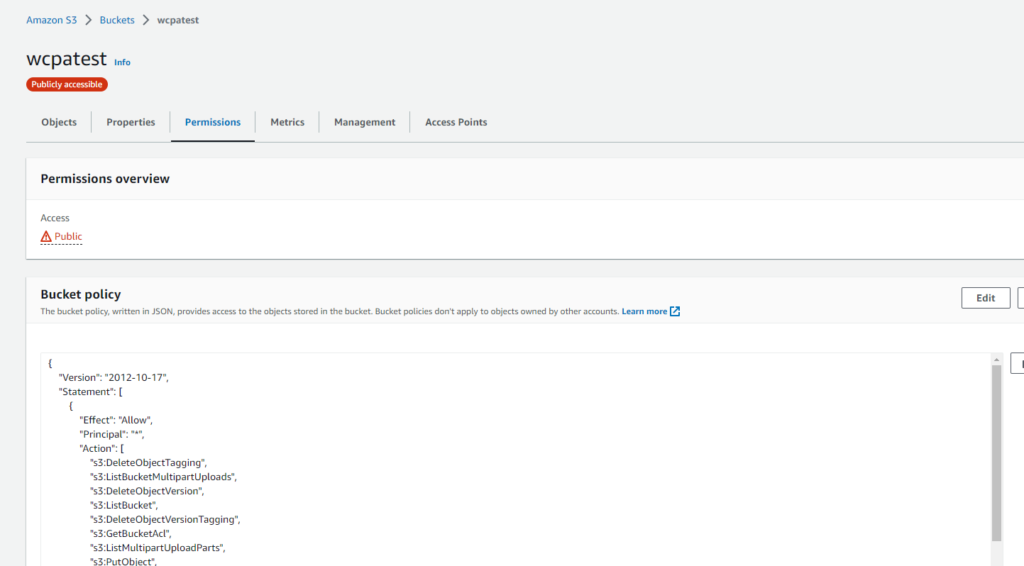
Replace the placeholders in the following policy:
{
  "Version": "2012-10-17",
  "Statement": [
    {
      "Effect": "Allow",
      "Principal": {
        "AWS": "arn:aws:iam::6580xxxx007:user/demo" // Replace with your IAM user ARN
      },
      "Action": [
        "s3:DeleteObjectTagging",
        "s3:ListBucketMultipartUploads",
        "s3:DeleteObjectVersion",
        "s3:ListBucket",
        "s3:DeleteObjectVersionTagging",
        "s3:GetBucketAcl",
        "s3:ListMultipartUploadParts",
        "s3:PutObject",
        "s3:GetObjectAcl",
        "s3:GetObject",
        "s3:AbortMultipartUpload",
        "s3:DeleteObject",
        "s3:GetBucketLocation",
        "s3:PutObjectAcl"
      ],
      "Resource": [
        "arn:aws:s3:::<BUCKET_NAME>/*",
        "arn:aws:s3:::<BUCKET_NAME>"
      ]
    }
  ]
}
🔁 Replace <BUCKET_NAME> with your actual bucket name and update the IAM user ARN accordingly
Configuring the Offload Media Plugin for Amazon S3
Once the plugin is installed, follow these steps to configure it with your Amazon S3 bucket:
1. Access the Plugin Settings
- In your WordPress admin dashboard, go to Media Cloud Sync → Configure.
- You’ll see a Welcome screen. Click the Next button to proceed.
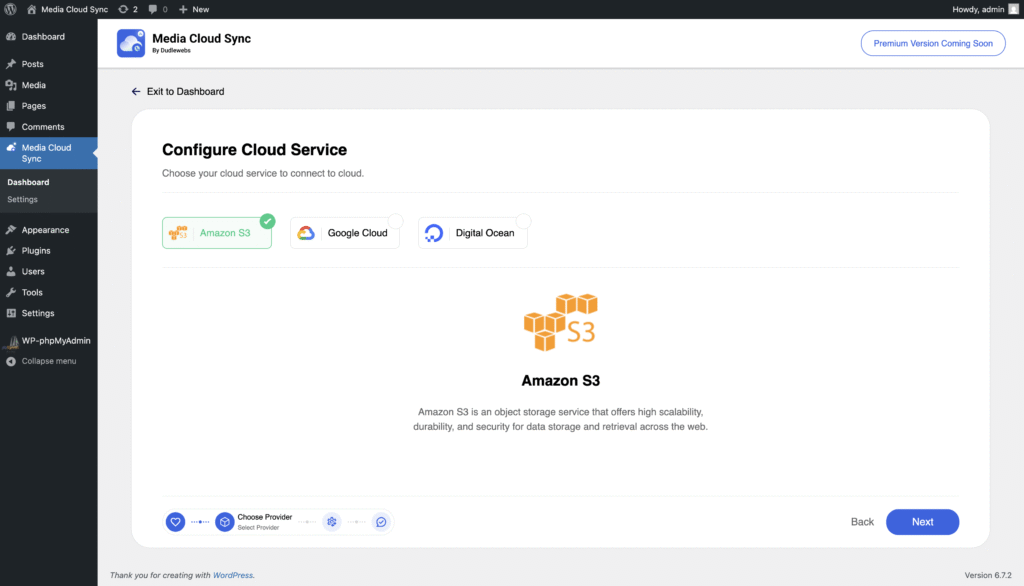
2. Select a Cloud Storage Service
- On the Service Selection page, choose Amazon S3.
- Click Next to continue.
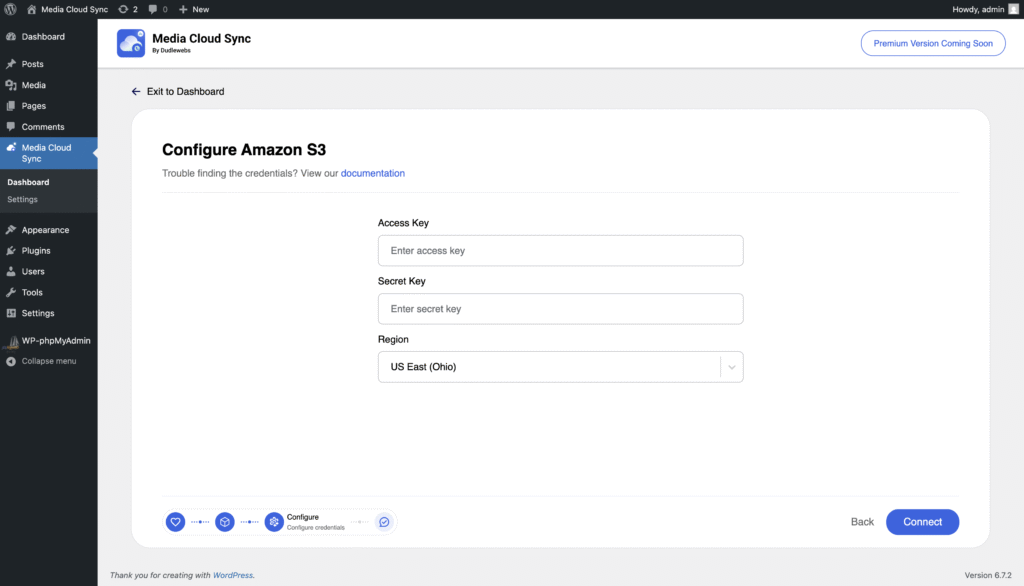
4. Enter Your AWS Credentials
- You’ll be prompted to enter the Access Key ID, Secret Access Key and Region that you created earlier.
- After entering the credentials, click Next to verify them.
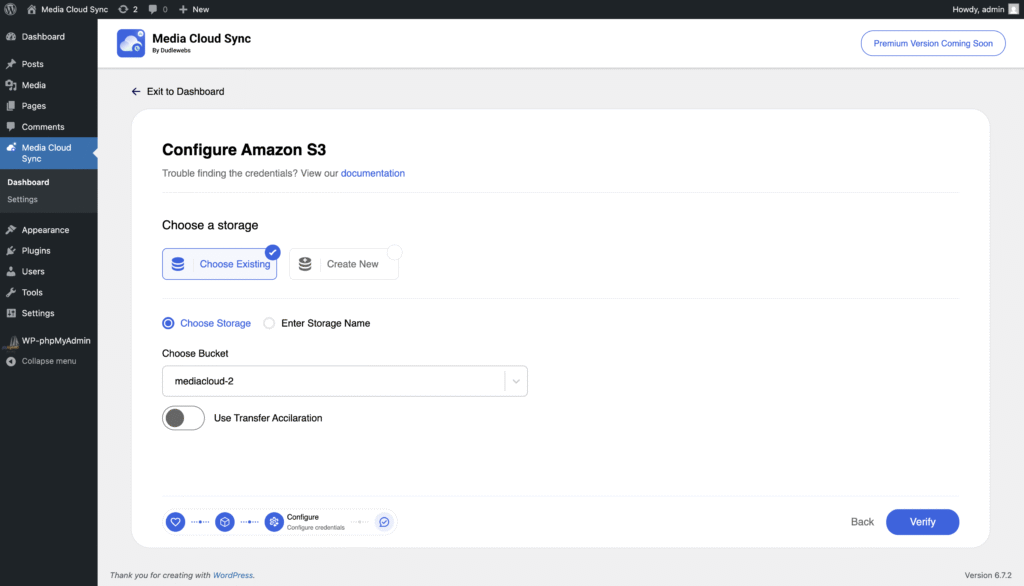
5. Configure S3 bucket
- You can choose an existing bucket from here
- Also you can create a bucket from here with recommended settings
- Click on Verify to continue
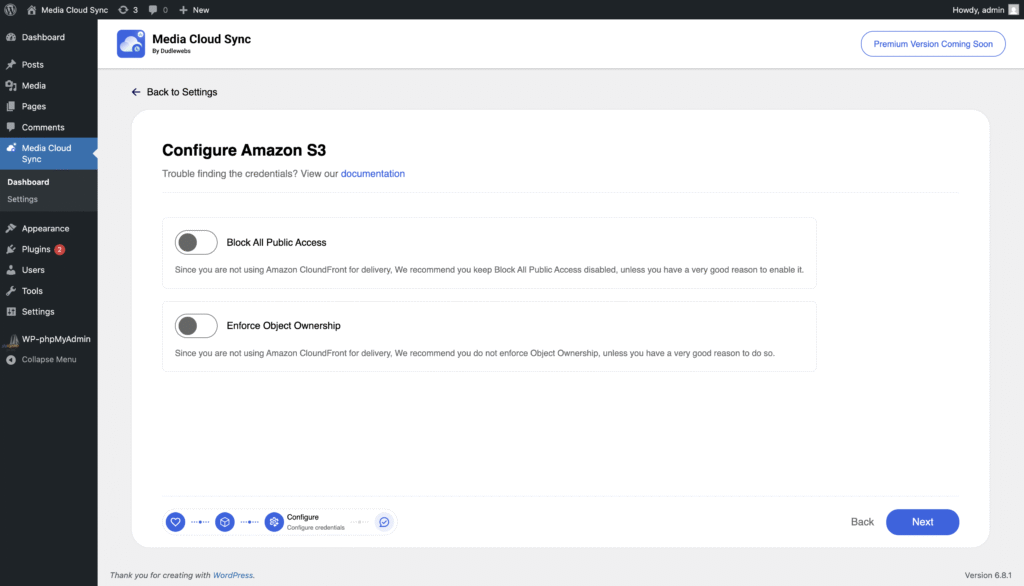
6. Set Security Configuration
- You can set public access and object ownership from here
- Click Next to continue.
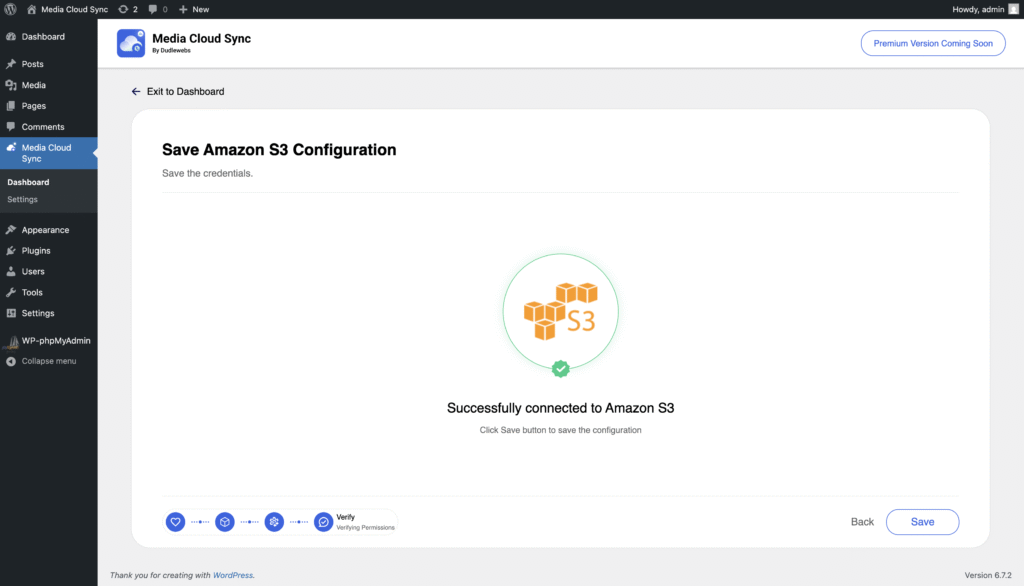
7. Verify and Save Configuration
- If the credentials are valid, you’ll see a verification success screen.
- Click Save to complete the Configuration setup.
- If verification fails, you can go back and correct the credentials.
8. Choose your Media Delivery Provider
- Choose a delivery provider
- If provide from AWS itself choose Amazon S3
- If you are using a CDN choose Other or CDN Provider listed
- If you choose Other add the CDN Provider Name.
- Click Save to complete the Configuration setup.

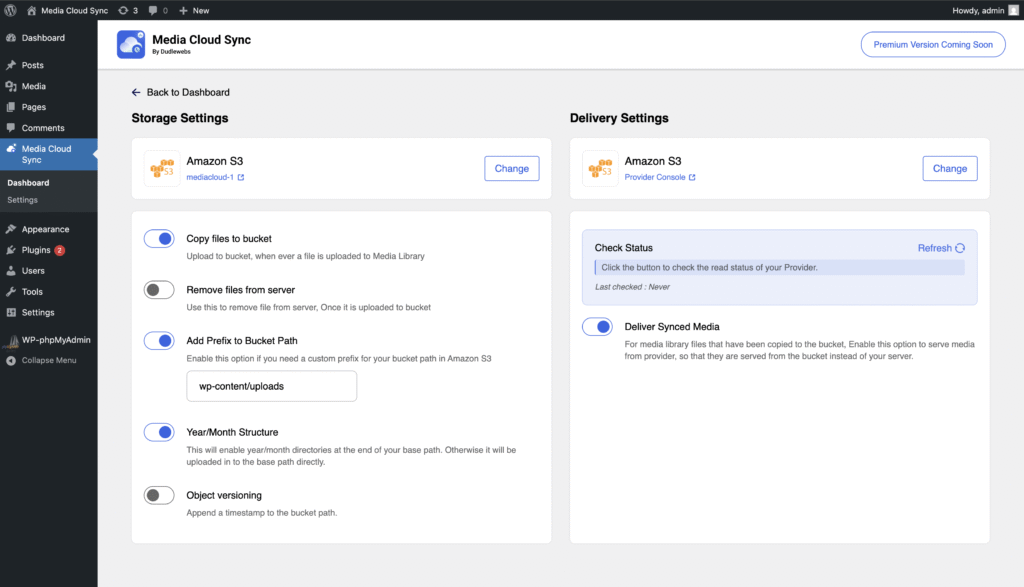
8. Configure Settings
- If you choose any CDN or Other Please enable CNAME and add the CDN endpoint in the field
- Check status for read permission is okay. If it is working your configuration is complete.
- If Status check is failed. Please check the CNAME is accurate.
- Still facing issues contact our live chat.
✅ You’re All Set!
Your WordPress site is now ready to offload media to Amazon S3.
Happy Offloading!