
Connecting Your Cloud Storage (Setup Wizard)
The setup wizard connects Media Cloud Sync to your cloud storage in five stages, shown in the panel on the left: Welcome → Choose Provider → Connect → Save → Delivery. The Connect stage has its own steps: Credentials, Bucket, Permissions, and, on Amazon S3 and Google Cloud Storage, Security.
This guide covers the wizard steps that are the same for every provider. For the provider-side preparation (creating keys and buckets), follow the guide for your provider:
Tip: Get your access keys and bucket ready in your provider’s console before starting the wizard.
Open the wizard
Go to Media Cloud Sync → Dashboard. On a new install, the Storage card shows Connect to cloud. Click Configure. You can also click Get Started under the plugin name on the Plugins screen.

Every wizard screen has Exit to Dashboard at the top, and a Need a hand? box with a link to your provider’s guide.
Step 1: Welcome
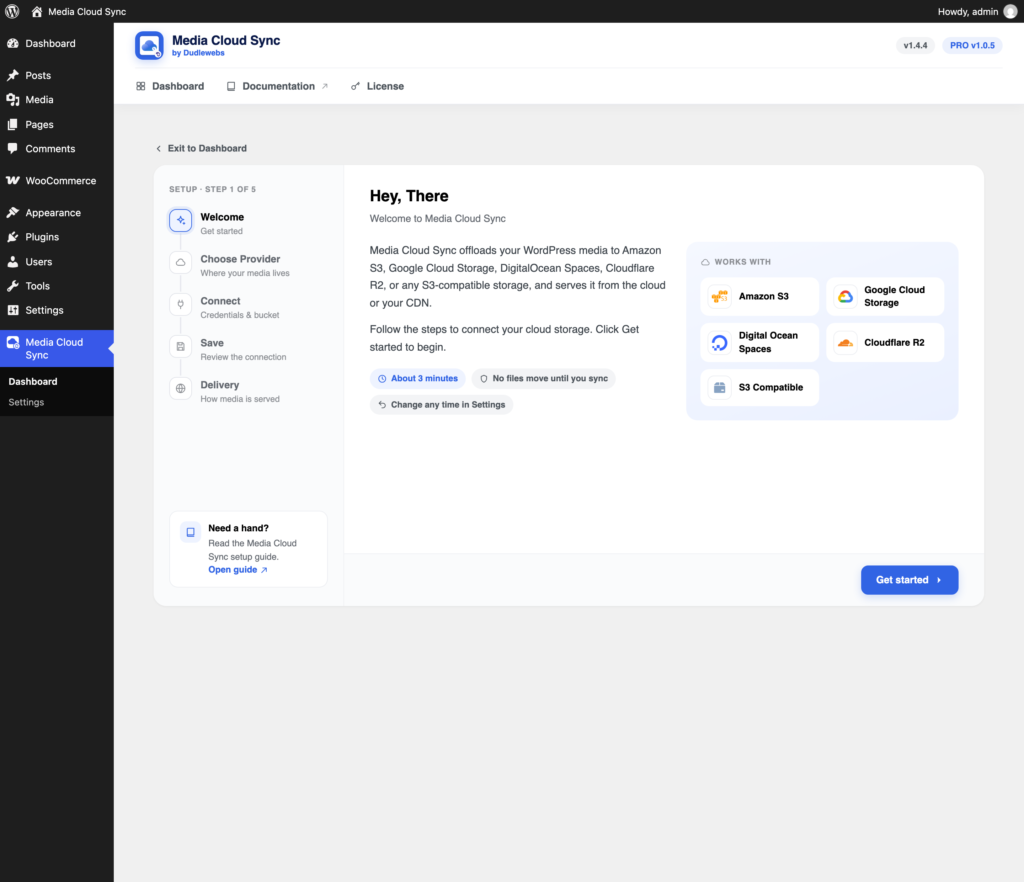
The welcome screen summarizes what the wizard will do. Click Get started.
Step 2: Choose your provider
Select the cloud service you want to use:
- Amazon S3
- Google Cloud Storage
- Digital Ocean Spaces
- Cloudflare R2
- S3 Compatible (Wasabi, Backblaze B2, MinIO, Linode/Akamai Object Storage, and others)
If you choose S3 Compatible, also enter a Provider label (for example “Wasabi”). This name is shown throughout the plugin.
Click Next.

Step 3: Enter credentials
First choose where the plugin should read your credentials from:
| Option | What it does |
|---|---|
| Use wp-config.php Constant (Recommended) | Keeps your keys out of the database. You add a WPMCS_CONFIG constant to wp-config.php, and the plugin reads it on the server. Keys are never sent to the browser. |
| Store in Database | Enter your keys directly in the form. Simplest option; the keys are saved in the WordPress database and masked in the admin screens. |
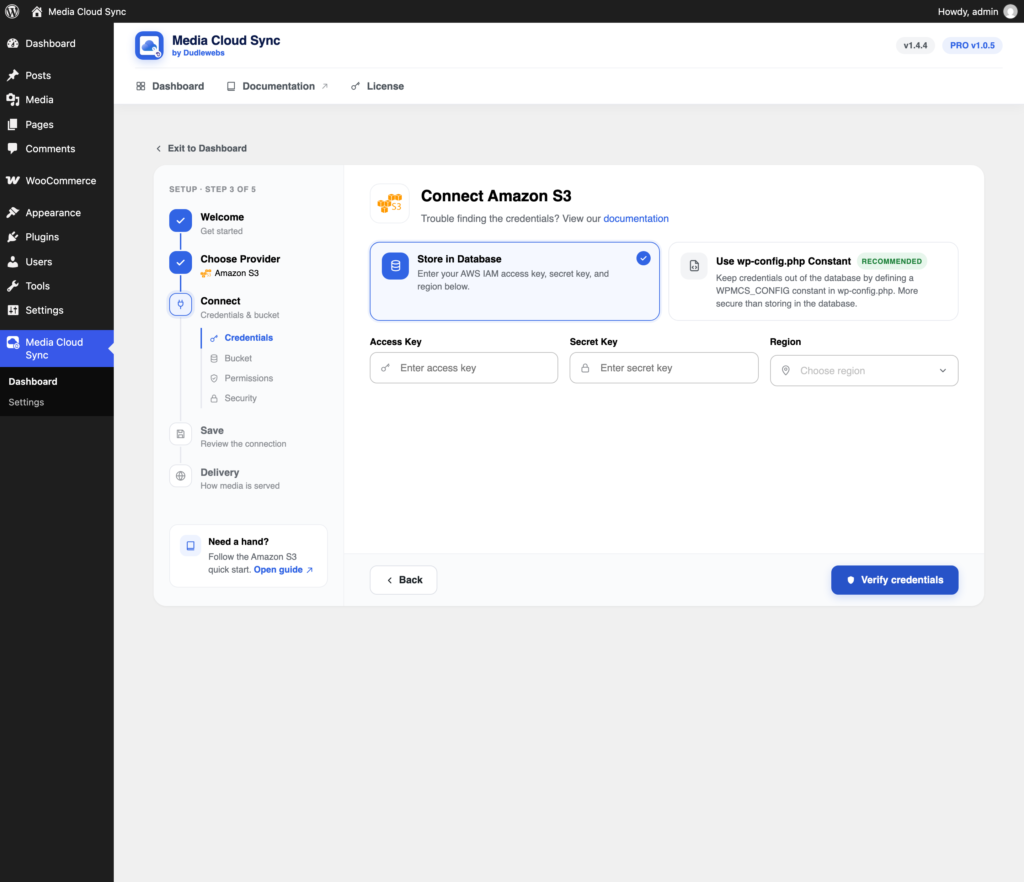
If you chose “Store in Database”, fill in the fields for your provider:
| Provider | Fields |
|---|---|
| Amazon S3 | Access Key, Secret Key, Region |
| Google Cloud Storage | JSON Config File (service account key) |
| DigitalOcean Spaces | Access Key, Secret Key, Region |
| Cloudflare R2 | Account ID, Data Jurisdiction / Region, Access Key, Secret Key |
| S3 Compatible | Storage Endpoint, Access Key, Secret Key, Region |
If you chose “Use wp-config.php Constant”, the wizard shows a ready-made snippet for your provider. Use the Copy button, paste it into wp-config.php above the /* That's all, stop editing! */ line, and replace the placeholder values. For providers with a region, pick your region in the wizard and copy its value from there. See Storing Credentials in wp-config.php for all snippets.
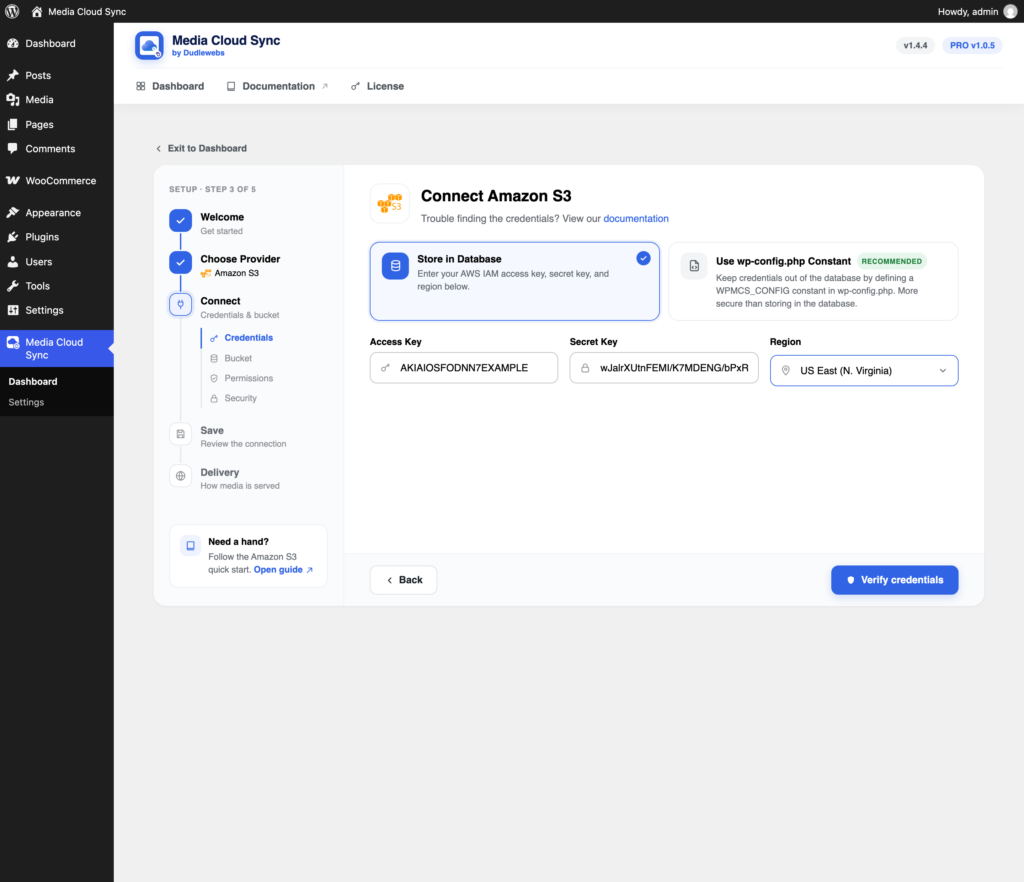
Click Verify credentials. The plugin connects to your provider and checks that the credentials are valid.
Step 4: Choose or create a bucket
Pick the bucket (on DigitalOcean, the Space) that should hold your media:
- Use existing Bucket: use Select from list to pick one, or Enter manually to type its name. Use Enter manually if your keys aren’t allowed to list buckets.
- Create new Bucket: enter a new bucket name (and a region, on Google Cloud Storage). The plugin creates the bucket for you.
On DigitalOcean Spaces, type the Space name rather than picking from a list. On S3 Compatible storage, type the bucket name; creating a new bucket from the wizard isn’t available for S3-compatible providers.
Bucket names must be 3–63 characters long and use lowercase letters, numbers, hyphens, and dots.
Amazon S3 only: turn on Use Transfer Acceleration if you have enabled S3 Transfer Acceleration on that bucket.
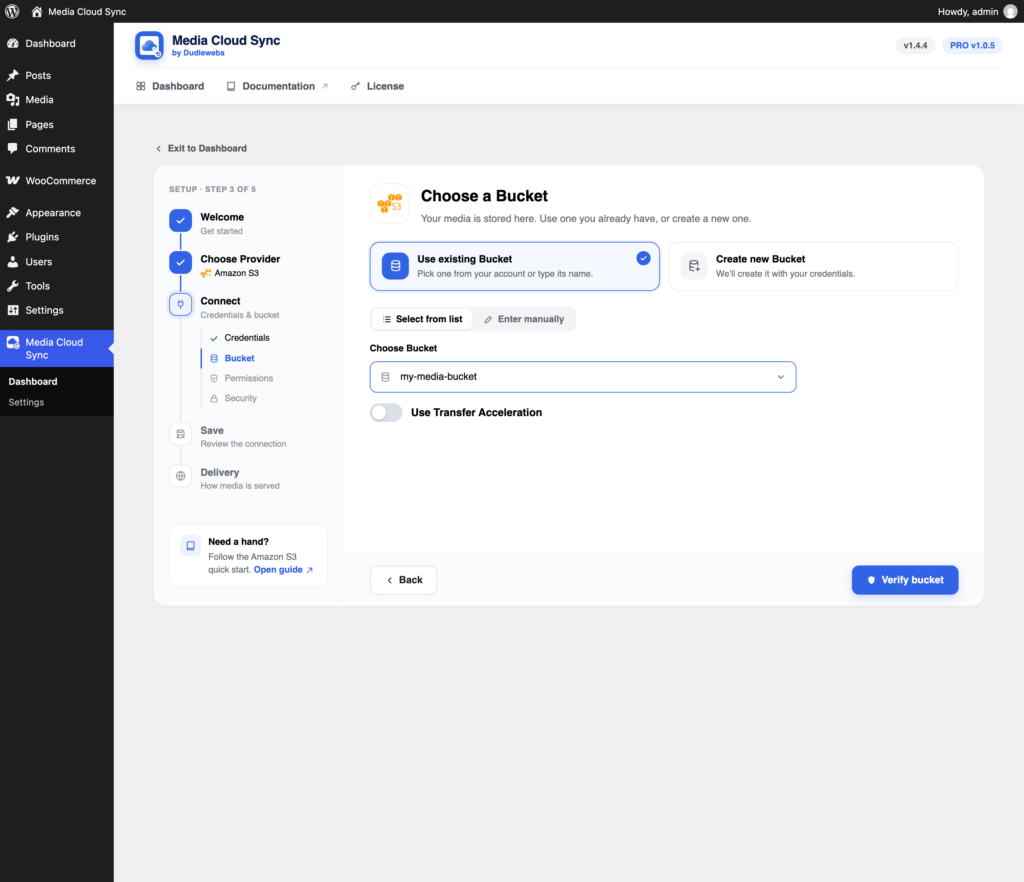
Click Verify bucket.
Step 5: Permission check
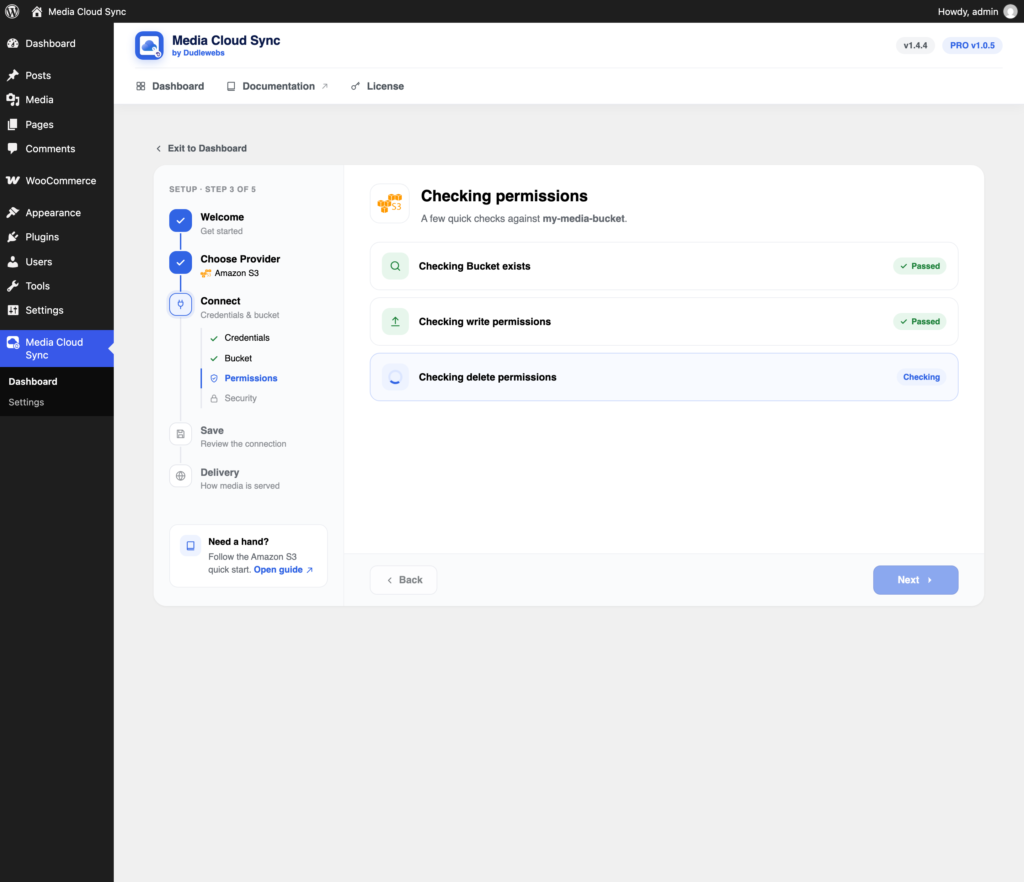
The plugin runs a live permission test on your bucket:
- Checking Bucket exists: confirms the bucket exists and can be read.
- Checking write permissions: uploads a small test file.
- Checking delete permissions: deletes that test file.
Every check must pass to continue. If one fails, go Back and fix the permissions for your key or bucket (see Troubleshooting).
Step 6: Bucket security (Amazon S3 and Google Cloud Storage only)
These settings change the bucket itself. Their current values are loaded from your account.
| Provider | Option | Recommendation |
|---|---|---|
| Amazon S3 | Block All Public Access | Keep off if you serve media straight from S3. Turn on only if you deliver through a CDN such as CloudFront that has its own access to the bucket. |
| Amazon S3 | Enforce Object Ownership | Keep off unless you deliver through CloudFront and know you need it. |
| Google Cloud Storage | Block All Public Access | Enforces Public Access Prevention on the bucket. Keep off when serving directly from GCS. Don’t combine with Private Media. |
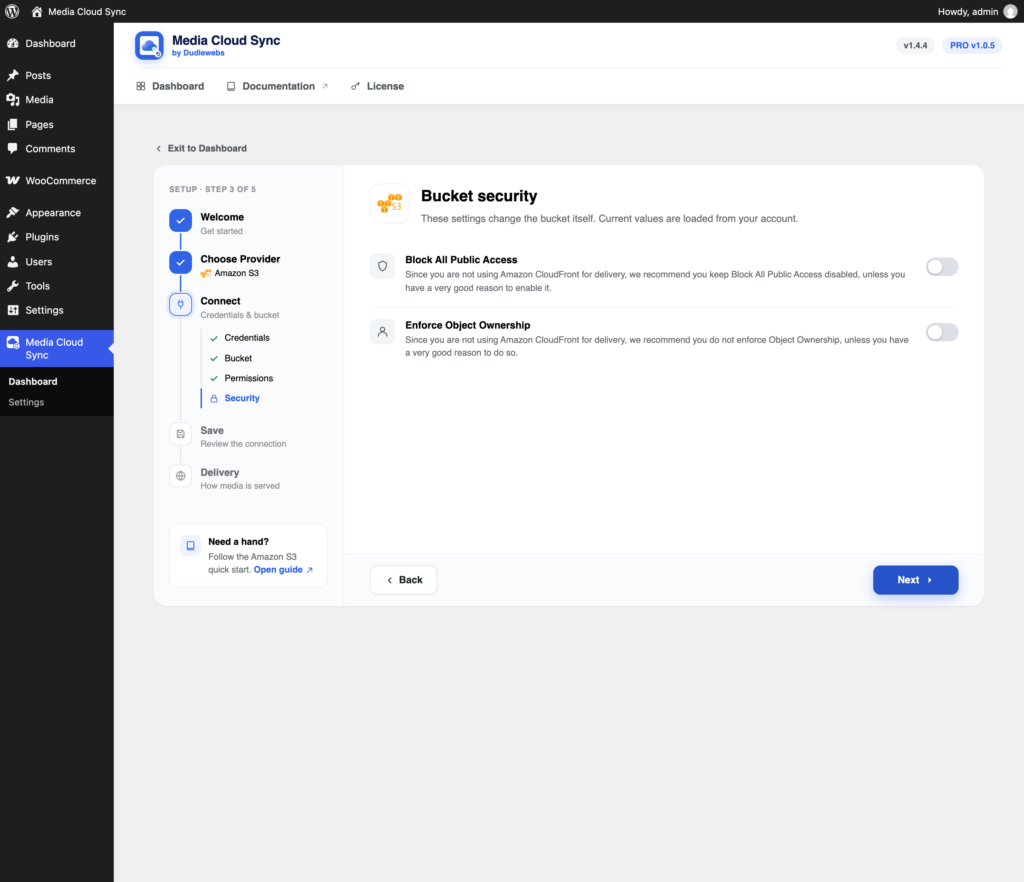
Click Next.
Step 7: Save
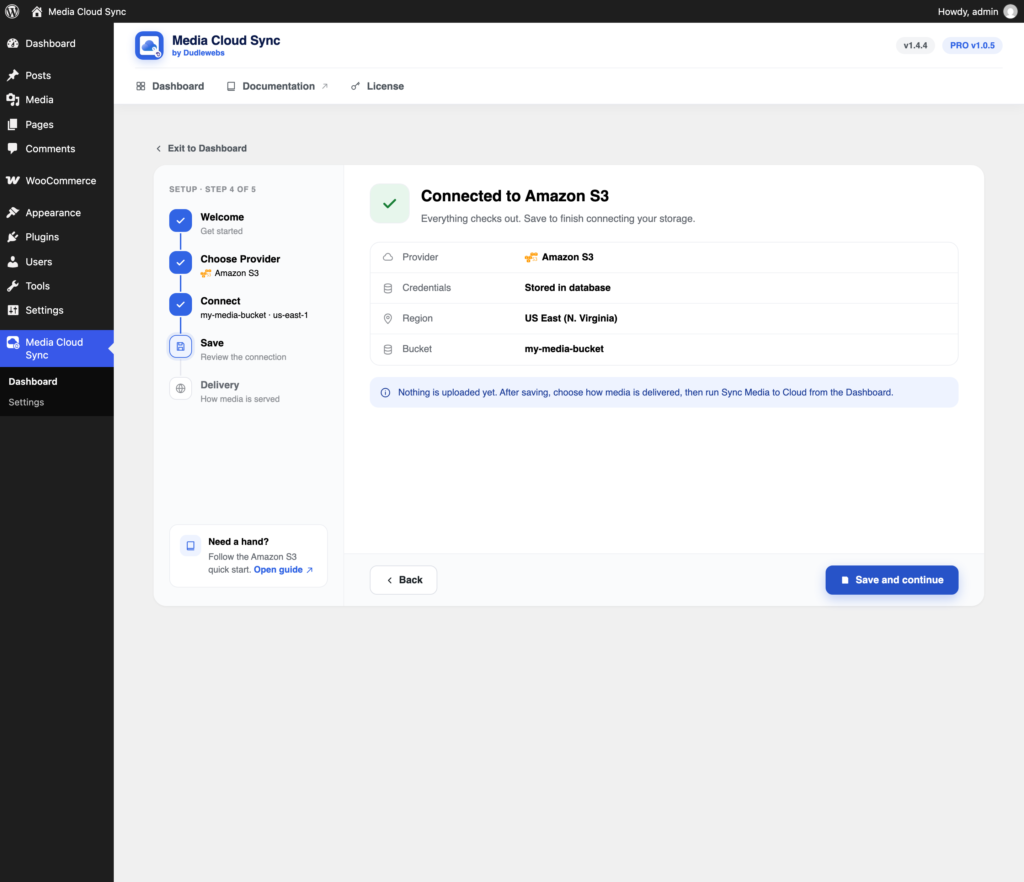
The wizard confirms that it’s connected and shows the connection for you to review. Click Save and continue.
Step 8: Choose how media is delivered
After saving, you’re taken to Choose how media is delivered. This decides which URL your media is served from:
- Your storage provider itself (for example Amazon S3): files are served straight from the bucket URL.
- A named CDN: Amazon CloudFront, Bunny.net, Fastly, Cloudflare CDN, Akamai, KeyCDN, Gcore, Leaseweb CDN, or CDNetworks.
- Other: any other CDN or custom domain. Enter a Provider Name.
Each card has tags: Fast or Slow, and Private media PRO where that option supports it.

Select a card and click Finish setup, or click Skip for now to choose later. See Delivery Settings and CDN for setting up a custom domain.
You’re connected
New uploads to the Media Library are now copied to your bucket automatically. Next:
- Review your Storage Settings.
- Upload a test image and check that its URL points to the cloud.
- Sync your existing media to the cloud.
Already have media in the bucket, or moving from another offload plugin? See Importing Existing Cloud Media PRO first.
Changing provider or bucket later
On Media Cloud Sync → Settings, click Change on the Storage card to run the wizard again.
Warning: Changing the provider or bucket does not move files that are already in the old bucket. To copy them across, use Migrate Bucket to Bucket
PRO.