
Quick Start: Google Cloud Storage
This guide shows you how to offload your WordPress media to Google Cloud Storage (GCS) with Media Cloud Sync.
You’ll need: a Google Cloud project with billing enabled, and Media Cloud Sync installed and activated.
Step 1: Create a service account
Media Cloud Sync authenticates with a service account JSON key.
- Open the Google Cloud Console and select your project.
- Go to IAM & Admin → Service Accounts and click Create service account.
- Enter a name, for example
media-cloud-sync, and click Create and continue. - Under Grant this service account access to project, add the role Storage Admin, then click Continue → Done.
Why Storage Admin? The plugin lists and creates buckets, sets bucket access (public access and Managed Folders for Private Media
PRO), and uploads and deletes objects. Storage Admin covers all of this.
To limit the account to one bucket, see Provider Permissions.
Step 2: Download the JSON key
- Open the service account and go to the Keys tab.
- Click Add key → Create new key, choose JSON, and click Create.
- A
.jsonfile downloads. Keep it safe; it’s the only copy.
If your organization blocks key creation (the
iam.disableServiceAccountKeyCreationpolicy), ask your Google Cloud admin to allow it for this project.
Step 3: Set up the bucket
Easiest: let the plugin create the bucket in the wizard. It turns on uniform access and makes the bucket publicly readable for you.
To use your own bucket:
- Go to Cloud Storage → Buckets → Create, or open your existing bucket.
- Enter a globally unique name and choose a location (region, dual-region, or multi-region).
- Under Choose how to control access to objects:
- Untick “Enforce public access prevention on this bucket” if files will be served straight from GCS.
- Choose Uniform access control.
- Click Create.
- If files will be served straight from GCS, make them readable. Open the bucket’s Permissions tab and click Grant access. Add the principal
allUserswith the role Storage Object Viewer, and confirm. See Google’s Make data public.
Or with the gcloud command line:
gcloud storage buckets add-iam-policy-binding gs://my-bucket --member=allUsers --role=roles/storage.objectViewer
Note: This role also lets anyone list the bucket’s files. Google suggests a bucket used only for public files.
Step 4: Connect Media Cloud Sync
- Go to Media Cloud Sync → Dashboard, click Configure, then Get started.
- Select Google Cloud Storage and click Next.
- Choose where to keep your credentials:
- Use wp-config.php Constant (recommended): paste the whole JSON key as a single-line string:
define( 'WPMCS_CONFIG', [ 'config_json' => '{"type":"service_account","project_id":"…","private_key":"…", …}', ] );The JSON contains double quotes, so wrap it in single quotes as shown. Keep the\nsequences insideprivate_keyexactly as they are in the file. - Store in Database: upload the
.jsonfile or paste its contents into JSON Config File.
- Use wp-config.php Constant (recommended): paste the whole JSON key as a single-line string:
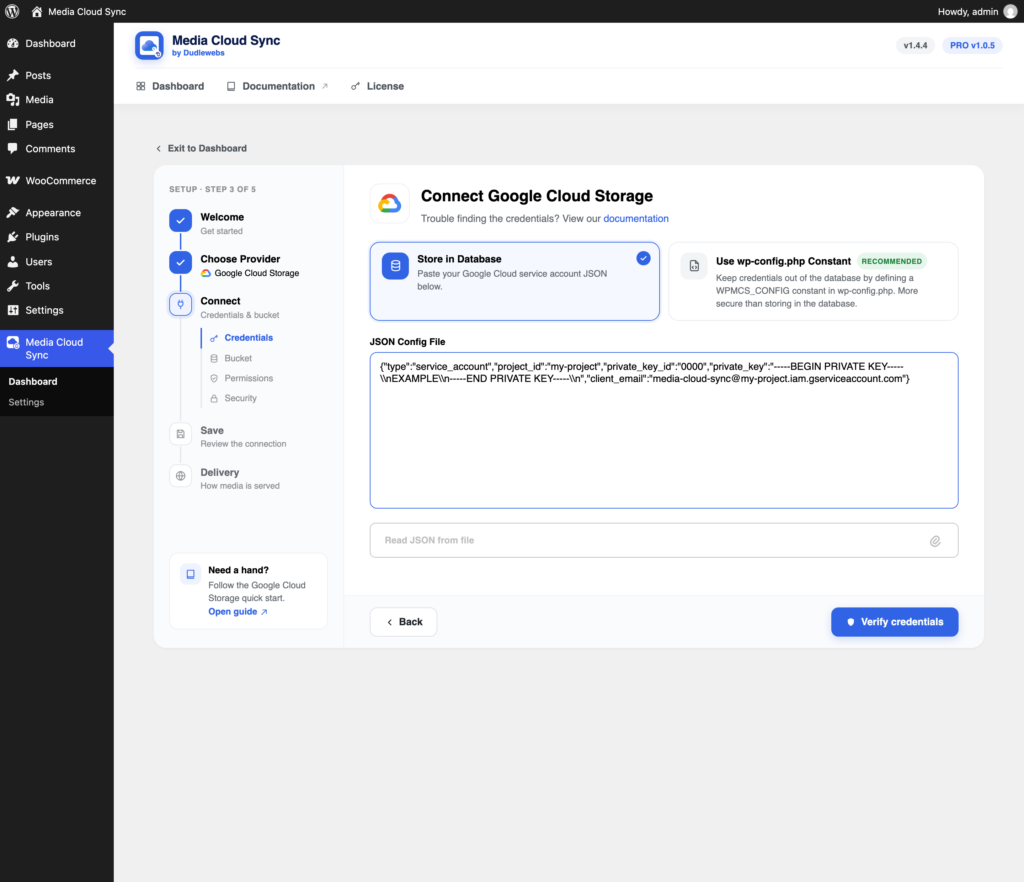
- Click Verify credentials.
Step 5: Choose or create the bucket
- Use existing Bucket: use Select from list, or Enter manually to type the name.
- Create new Bucket: enter a bucket name and choose a region. The plugin creates the bucket.
Bucket names can’t start with goog or contain google.
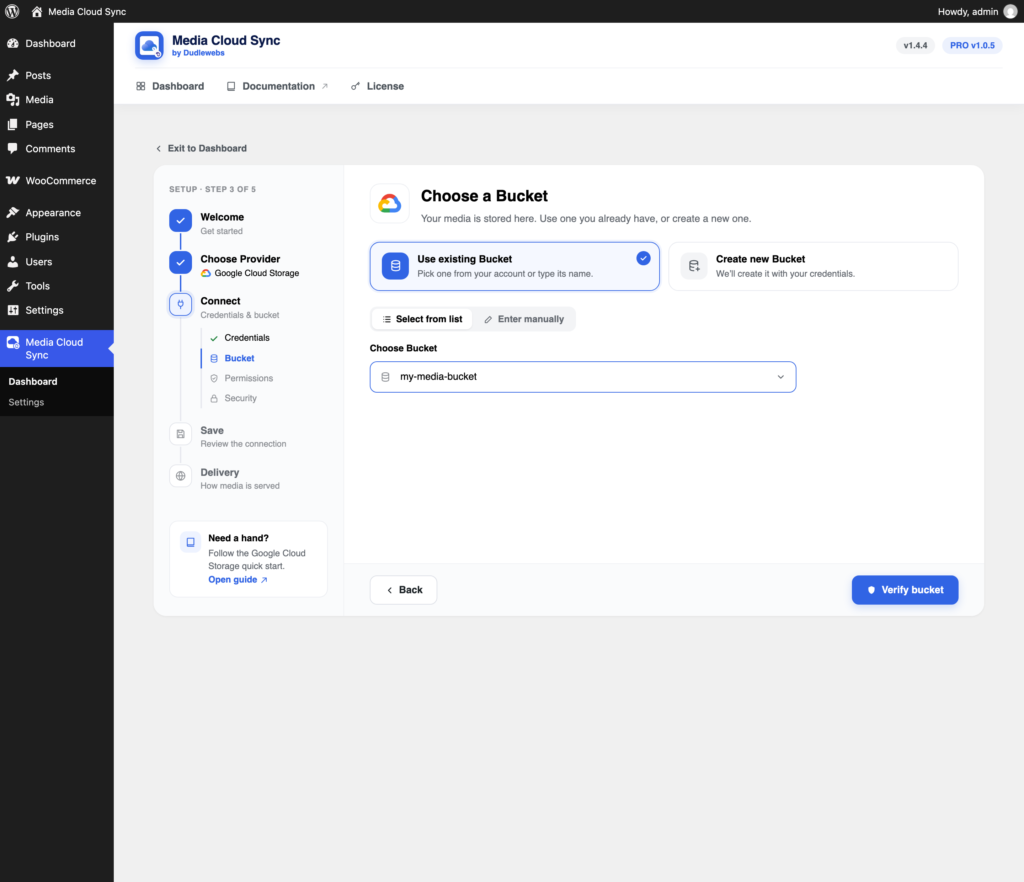
Click Verify bucket to run the read, write, and delete permission checks.
Step 6: Bucket security
Block All Public Access turns on GCS Public Access Prevention for the bucket.
- Keep it off if visitors load media straight from GCS. With it on, no file in the bucket can be publicly viewed.
- Don’t turn it on together with Private Media
PRO, because it also blocks the public files that feature relies on.
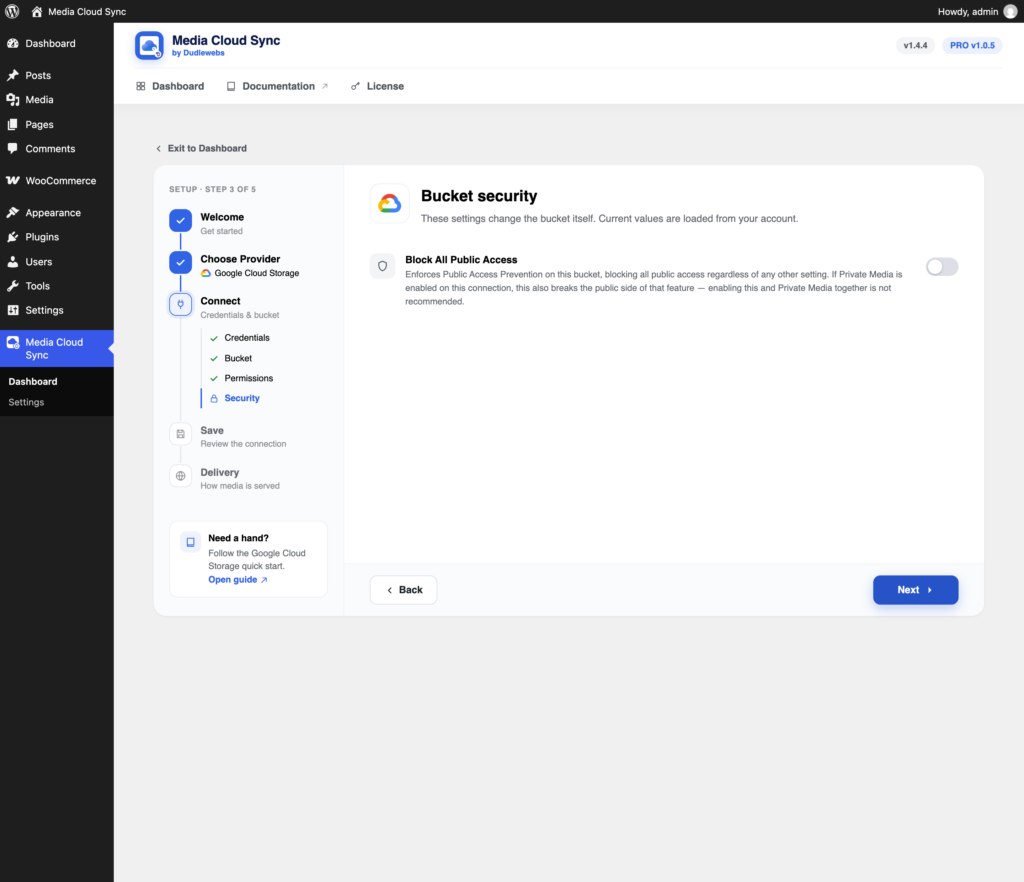
Click Next, then Save and continue.
Step 7: Choose how media is delivered
- Google Cloud Storage: serve from
https://storage.googleapis.com/your-bucket/.... - A CDN or Other: enter your CDN or custom domain under Use Custom Domain Name (CNAME).
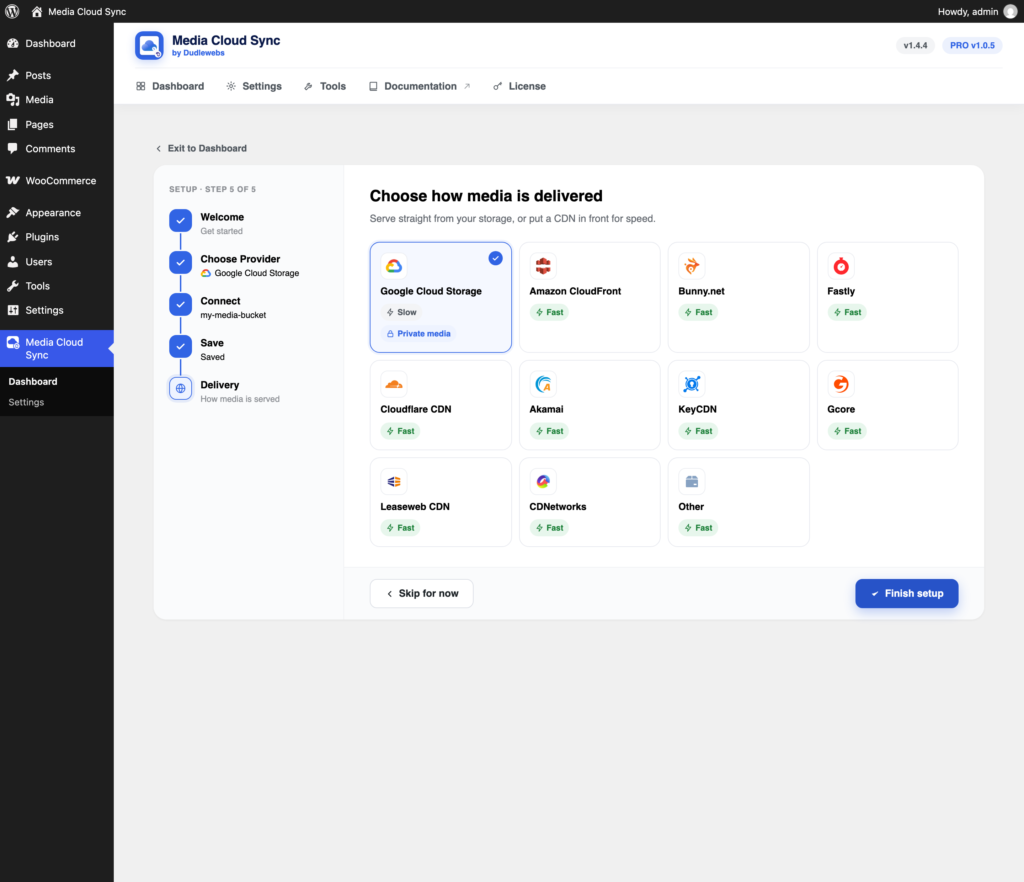
Click Finish setup, then use Recheck on the Delivery card in Settings to confirm files can be read.
Private Media on Google Cloud Storage PRO
On GCS, Private Media uses Managed Folders to keep your public base path readable while private files stay private. This needs:
- Add Prefix to Bucket Path turned on in Storage Settings (a base path is required).
- Block All Public Access turned off.
After enabling Private Media and saving, click Apply Policy on the Delivery card. Saving alone doesn’t change the bucket. Note that applying it removes public access from anything in the bucket outside the configured base path.