
Quick Start: Cloudflare R2
This guide shows you how to offload your WordPress media to Cloudflare R2 with Media Cloud Sync. R2 has no egress fees, so it’s a cost-effective choice for media-heavy sites.
You’ll need: a Cloudflare account with R2 enabled, and Media Cloud Sync installed and activated.
Important: R2 buckets are private by default, and R2’s API endpoint can’t serve files to visitors. To show offloaded media on your site, you must give the bucket a public URL: either the
r2.devsubdomain or a custom domain (Step 2). You’ll enter it as the delivery domain in Step 6.
Step 1: Create an R2 bucket (optional)
You can create the bucket now, or let the plugin create it in the wizard.
- In the Cloudflare dashboard, go to R2 Object Storage → Create bucket.
- Enter a name. Choose a location or jurisdiction (EU or FedRAMP) if you have data-residency requirements.
- Click Create bucket.
Step 2: Give the bucket a public URL
Open the bucket and go to Settings. Use one of these options:
- Custom Domains → Connect Domain (recommended for production): use a subdomain on a zone in your Cloudflare account, for example
media.example.com. You get Cloudflare’s CDN caching automatically. - Public Development URL (r2.dev) → Enable: gives you a URL like
pub-xxxxxxxx.r2.dev. Cloudflare rate-limits this URL, recommends it for testing only, and doesn’t cache it.
Copy the domain. You’ll need it in Step 6.
Step 3: Create R2 API credentials
- On the R2 Object Storage overview page, copy your Account ID (shown in the right-hand panel).
- Click Manage API tokens (or API → Manage API Tokens) and choose Create API token.
- Set Permissions to Object Read & Write. Choose Admin Read & Write instead if you want the plugin to list or create buckets.
- Optionally limit the token to your bucket, then click Create API Token.
- Copy the Access Key ID and Secret Access Key (the S3-compatible credentials, not the token value).
Important: The secret is shown only once.
If your token is limited to one bucket with Object Read & Write, the bucket list will be empty in the wizard. Just type the bucket name.
Step 4: Connect Media Cloud Sync
- Go to Media Cloud Sync → Dashboard, click Configure, then Get started.
- Select Cloudflare R2 and click Next.
- Choose where to keep your credentials:
- Use wp-config.php Constant (recommended):
define( 'WPMCS_CONFIG', ['account_id' => 'YOUR_ACCOUNT_ID','access_key' => 'YOUR_ACCESS_KEY','secret_key' => 'YOUR_SECRET_KEY','region' => '',] );
Forregion, leave it empty for Global (Default), or useeuorfedrampif the bucket was created in that jurisdiction. - Store in Database: enter Account ID, Data Jurisdiction / Region, Access Key, and Secret Key.
- Use wp-config.php Constant (recommended):
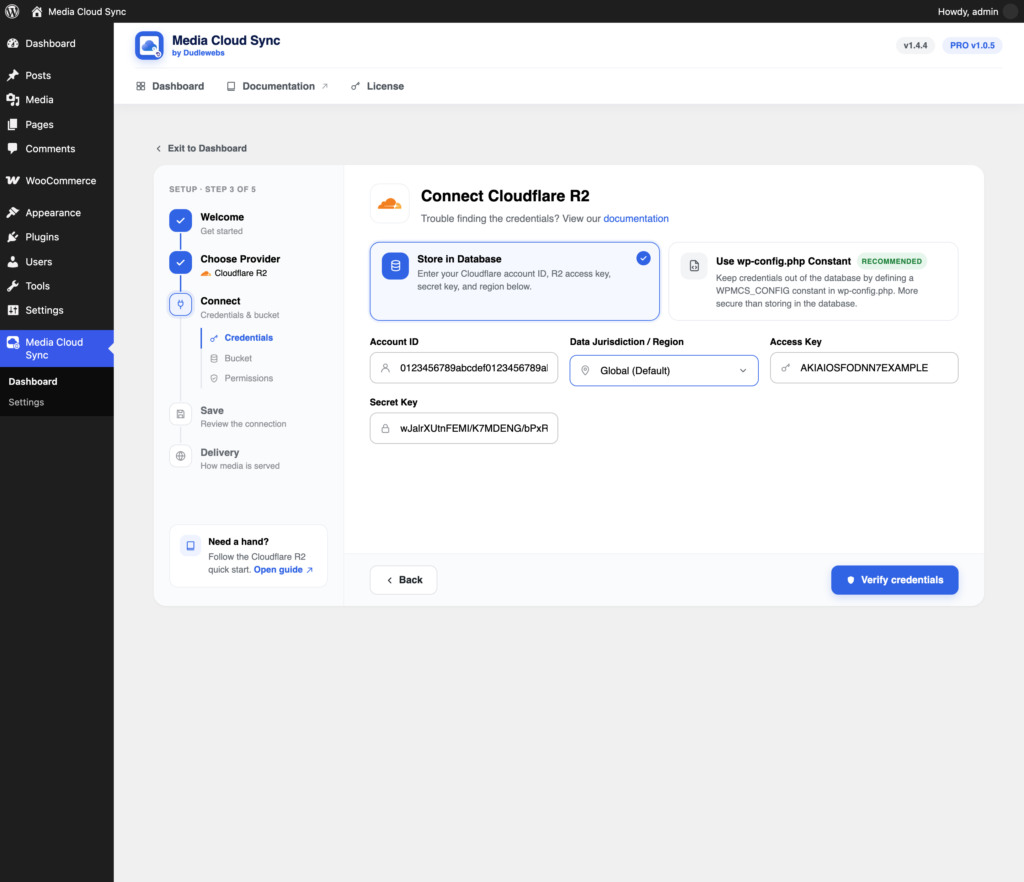
- Click Verify credentials.
Step 5: Choose or create the bucket
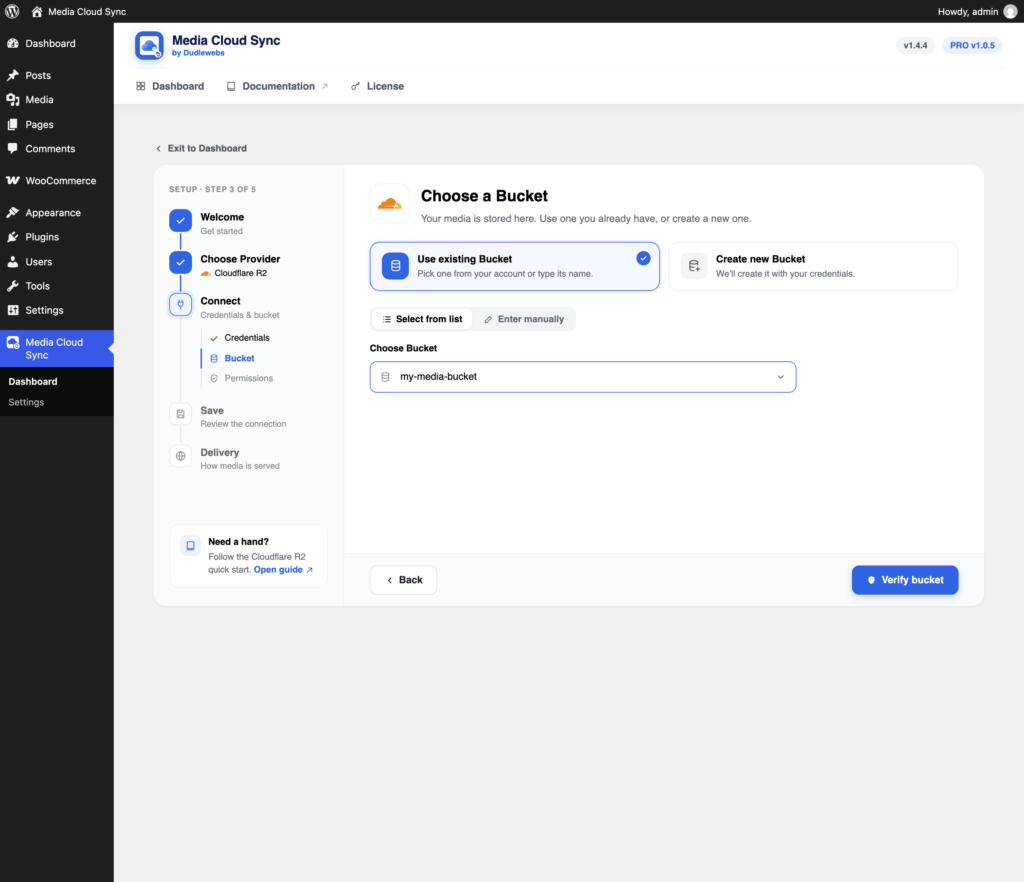
Choose your bucket with Select from list or Enter manually, or use Create new Bucket. Click Verify bucket to run the permission checks, then click Save and continue.
Step 6: Set the delivery domain (required)
On Choose how media is delivered, select Cloudflare R2 (or another CDN in front of R2) and:
Under Use Custom Domain Name (CNAME), enter the public domain from Step 2, such as media.example.com or pub-xxxxxxxx.r2.dev, without https://.
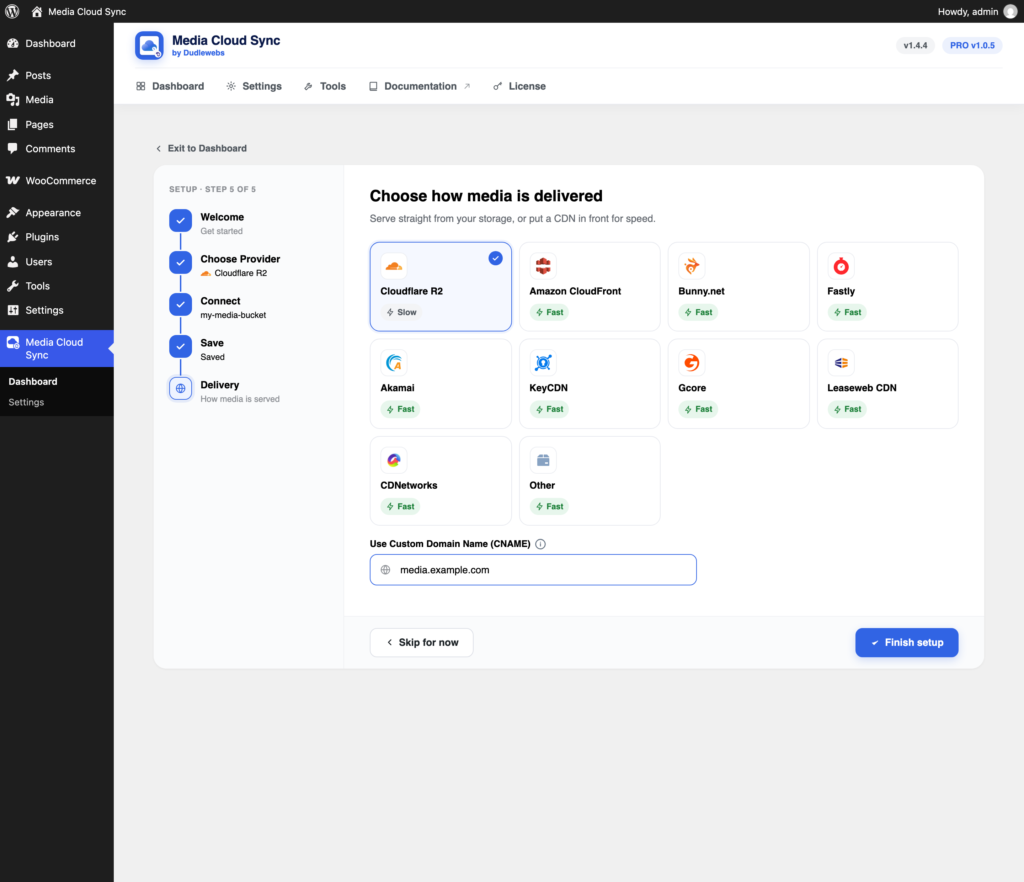
Click Finish setup, then click Recheck on the Delivery card in Settings. It should report that objects are accessible.
Note: Private Media
PROisn’t available for Cloudflare R2. Delivering through a Cloudflare custom domain lets you use CDN Cache PurgePRO;r2.devaddresses have no cache to purge.
Which token permission to choose
| Permission | Lets the plugin | Use when |
|---|---|---|
| Admin Read & Write | List and create buckets, change CORS and lifecycle rules, plus everything below | You want the wizard’s bucket list, Bucket CORS, or a lifecycle rule in Change Storage Class |
| Object Read & Write | Read, write, list, and delete files in the chosen buckets | Normal use, limited to one bucket. Type the bucket name in the wizard. |
See Cloudflare’s R2 authentication guide.
Jurisdictions
A bucket created in a jurisdiction can only be reached through that jurisdiction’s endpoint, so Data Jurisdiction / Region in the wizard must match the bucket. The FedRAMP jurisdiction isn’t self-serve: enterprise customers get it from Cloudflare. See Data location.